I have a love/hate relationship with stitch markers. Love: the utility; the way they allow me to AutoKnit in front of the TV; the way they promise that I only have to count stitches for those felted clogs just the once.
Hate: the way the plastic ones ping off the needles at inopportune moments; the way beaded ones dangle; the way the metal ones snag in the yarn; and most especially the very idea that calling them “jewelery for your knitting needles” somehow elevates this ubiquitous little tool into a Must Have knitting accessory.
Fortunately, Honeyflake’s beaded stitch marker tutorial offered the perfect opportunity to create my perfect stitch marker.
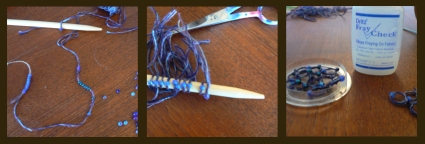
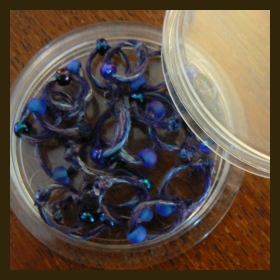
Here’s what I came up with, using only items that I had on hand – linen yarn sample from Amy’s No Sheep cruise workshop (Honeyflake uses hemp, but I imagine any sturdy bast fiber will do); beads from my sister, Pam.

I streamlined the process by threading the beads all at once, before knotting the beaded linen yarn around a 5mm dpn for uniformity, and secured each knot with a drop of Fray Check. The finished markers are cheap, pretty, and guaranteed not to ping, dangle or snag. Time to complete – about half an hour.


Brenda!
I love the redesign! I also love, love, love this idea! I’m going to run home and put all of those leftovers of well-loved yarn to good use! Yeah!
Eeee! Brilliant. I’m going to have to try this soon.